
Flux Reference Manual

  • Welcome to Flux
  • Introduction
    • Installing the software
    • The user interface
    • Part workflow
  • CAD
    • 2-D Import
      • 2-D Cleanup
    • 3-D Import
      • Import 3D Model
      • Import assembly
      • Form detection
      • Component detection
    • Modifying the geometry
    • Attachments
  • Cut CAM
    • Part workflow
      • Editing panels
        • Laser cut
          • Approach
          • Withdrawal
          • Microjoint
          • Advanced
        • Contour
        • Scrap cut
        • Part
        • Corner treatment
      • Quick-Nest
    • Job workflow
      • Job panel
        • Sheets tab
        • Parts tab
        • Layouts tab
        • Summary tab
      • Edit layout
        • Nesting modes
        • Placement panel
        • Sequencing
        • Slice sheet
    • Bevel cut
      • Open contours
      • Variable bevel
      • Miscellaneous
    • Advanced
      • Finishing rules
      • Edit LTT
      • FlyLine
      • TwinLine
        • Strategy
        • Microjoints
        • Further settings
      • DetectLine
  • Bend CAM
    • Create bend data
    • Bend navigator
    • Edit bend data
      • Edit a bend
      • Edit a tool mount
      • Edit a bend setup
      • Edit the back-gauges
      • Edit angle measurement
      • Bends spreadsheet
      • Changing the sequence
      • Adding setups and stations
    • Advanced
      • Angle measurement
      • Batch process
      • Recompute solution
      • Tonnage check
    • Bending Aids
  • BendMaster CAM
    • Bend navigator
    • Part pickup
      • Pickup from pallet
      • Pickup from dispenser
    • Robotic bending
      • Insertion
      • Bending
      • Extraction
    • Regripping
      • Regrip panel
      • Add regrip
      • Edit regrip
      • Regrip with jaw
      • RG-Stations panel
    • Part deposit
      • Deposit pattern types
      • Deposit tabs
      • Add separator sheets
      • Lock part-rest
    • Advanced
      • Waypoints
      • Cell configuration
      • Custom Cell Components
      • Gripper database
        • Create a gripper
        • Import gripper from DXF
        • Import Suction Cup
  • Flex Cell CAM
    • Bend navigator
    • Part pickup
      • Pickup from pallet
      • Centering table
    • Robotic bending
      • Strategy panel
    • Regripping
      • Regrip panel
      • Add/Remove regrip
      • Gripper Panel
      • Double Sheet Station
    • Part deposit
      • Deposit Tabs
    • Advanced
      • Waypoints
    • Troubleshooting
  • Fold CAM
    • Create fold data
    • The Fold view
    • Editing Fold data
      • Edit a bend
      • Edit a side/section
      • Change the sequence
      • Edit the blank-holders
      • Edit the gauging
      • Edit the blades
      • Edit the loading
      • Edit the unloading
    • Tool inventory
    • Advanced
      • Custom air-gap tables
      • Manual bend completion
      • Required flange length
  • Settings
    • Drawing
      • Layers
      • Dimensions
      • View
    • Bend CAM
      • Machine defaults
      • Bend outputs
      • Bend view
      • Bend cell
    • Cut settings
      • Cut CAM
      • Layout
        • Nest settings
        • Sheet
        • Sheet handling
        • Skeleton cuts
        • Work support
      • Laser CAM
        • Sequence
      • Cut outputs
      • Cut view
    • Panel bending
      • Defaults
      • ZBW carriers
      • Outputs
    • Reports
      • Item defaults
    • Import/Export
    • Environment
  • Database
    • Materials
    • Machines
    • Bend tools
    • Bend deductions
    • Bend grippers
    • Forms and Components
  • Reports
    • Report designer
    • Fields, pictures and tables
    • Bands (sub-reports)
    • Labels, bitmaps and shapes
  • Appendix
    • Supported 3D formats
    • Separator sheet DXF
    • Bend tool DXF
    • The Adapt Geometry feature
Flex Cell CAM
/
Robotic bending

Robotic bending

RobotBending

The Robotic Bending section covers how the Flex Cell CAM handles each bending operation, from inserting the part into the press brake through to extracting it once the bend is complete.

Panels

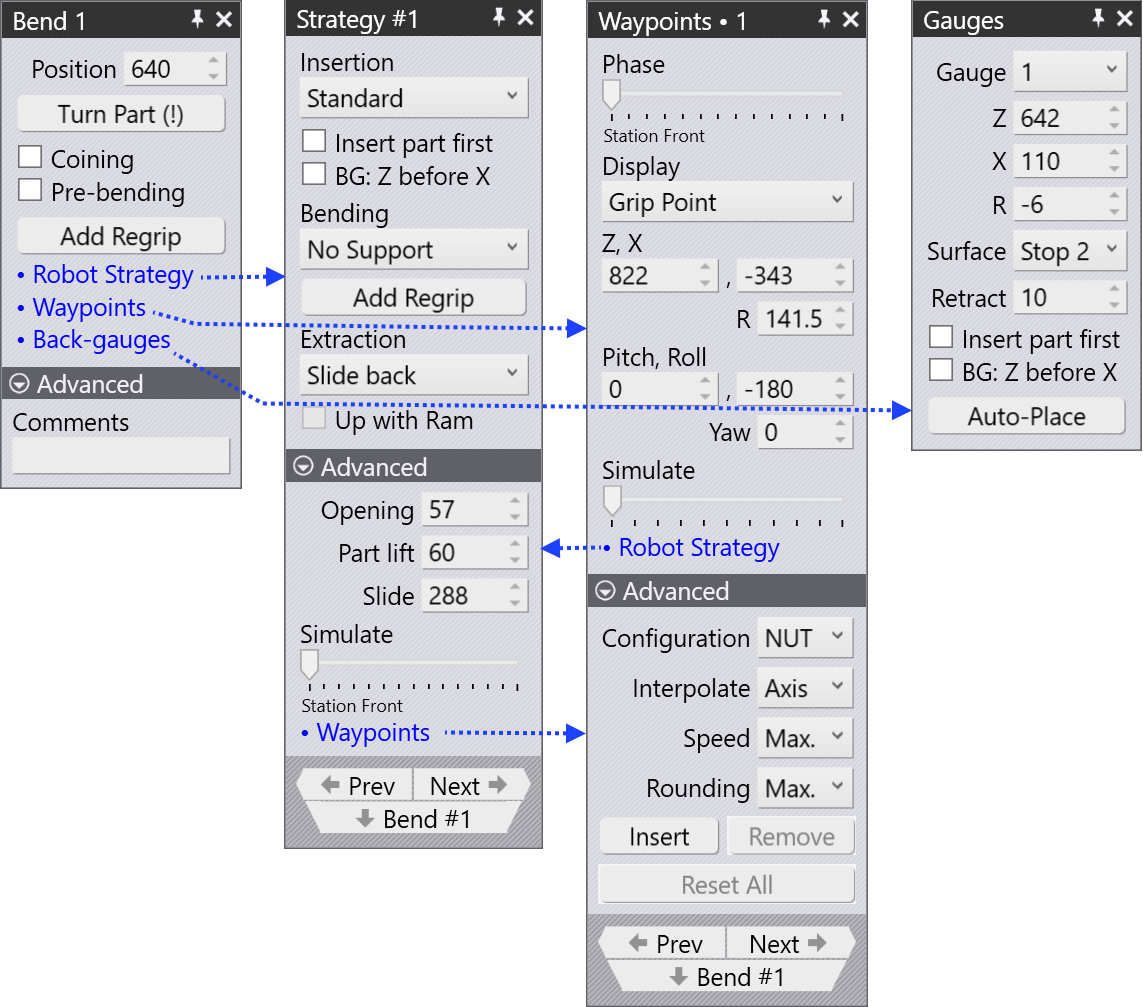
The image below shows the panels that cover all the settings to perform the robotic bending operation.
RobotBendingPanels

Bend panel

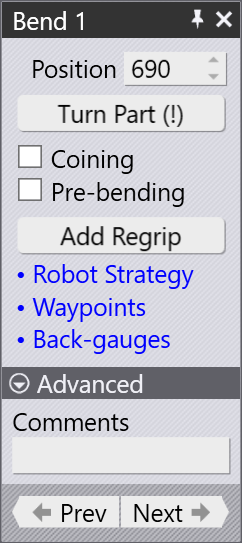
The basic settings for a bend can be viewed and edited by using the Bend panel. Click on a bend in the bend navigator to open the bend panel to edit that bend.
Bend Panel

  • Position: This setting determines where the bend will occur. For example, if the machine length is 3000 mm and you enter 1500 mm, the bend will be positioned 1500 mm from the machine’s origin. The reference point for this position can be the center of the die/punch or either the left or right end, and this can be selected as needed.

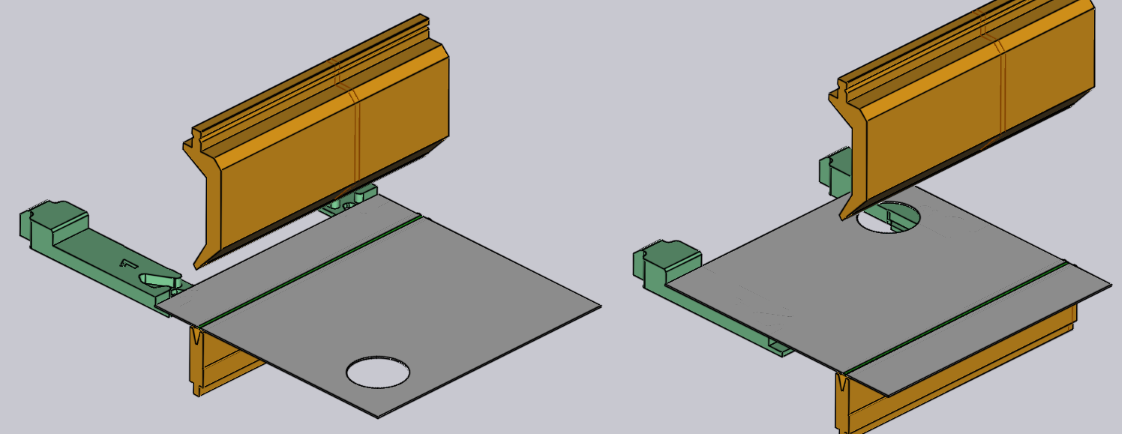
  • Turn Part: This button is used to flip the part (insert it with the other side into the machine).
    Flip Part

  • Coining: Turn on this check-box to tell Flex Cell CAM to use a coining operation. This is enabled only if a coining would be possible (typically, this means there is a coining-capable punch and die that can be used). Coining requires more press force but can result in a tighter bending radius than an air-bending can. Coining also requires that you have a punch and die with the exact angle that is required for this bend operation.

  • Pre-bending: Turn on this option to split this bend into two separate operations - a pre-bend, and the finishing bend. By default, Flex Cell CAM will move the finishing bend to a position that is just after the next bend in the sequence. Refer Editing a Bend for more on using a pre-bend.

  • Robot Strategy: This link takes you to the Strategy panel where you have more precise control over the processing strategy for different phases of each bending operation.

    • Part Insertion

    • Bending process

    • Part Extraction

  • Waypoints: This link takes you to the Waypoints panel where you can have precise control over the robot trajectory during the bending process.

  • Gauges: This link takes you to the Editing a gauge panel of manual press brakes. Many of the settings on this panel are the same as for manual press brakes. The additional settings specific to robotic bending like insert part first, BG: Z before X are explained in the Part Insertion page.

  • Prev and Next: These buttons are used to cycle through editing the different bends in the part.

Contents

  • Panels
  • Bend panel
Centering table Strategy panel

      Copyright © 2026 TRUMPF Metamation. All rights reserved.

    Compiled by Bento