
Job workflow
Flux has a nesting engine that can take varying quantities of different types of parts, and pack them efficiently on one more sizes of sheets. To create a new nesting job, use the File / New / Nesting Job menu, or just press the J key.
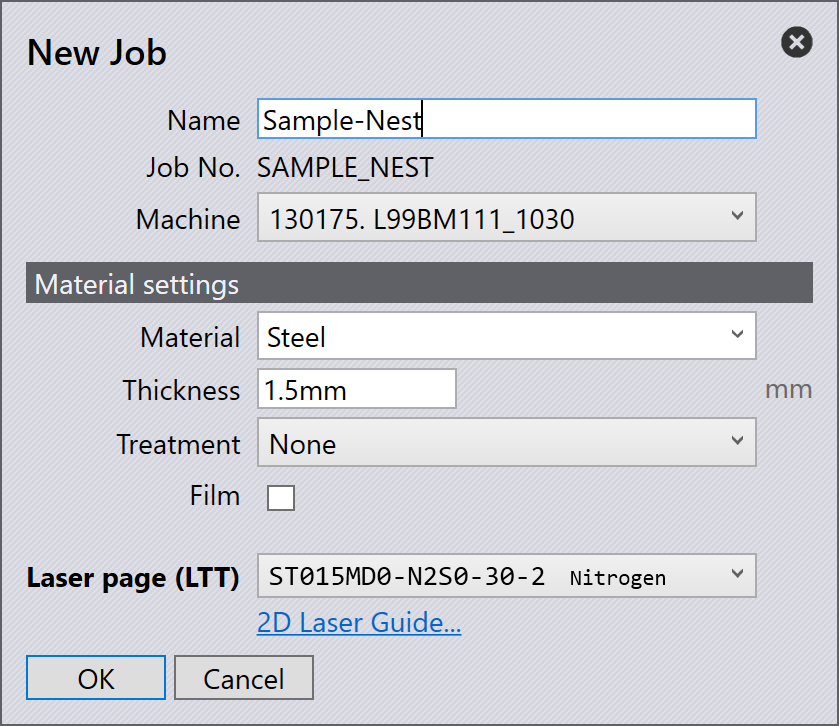
-
Type in a Name for the nesting job (a job number is calculated automatically).
-
Select a Machine from the list of available machine.
-
The Material, Thickness, Treatment and Film settings are used to select the material that will be used for all the parts in the nesting job.
-
Based on the inputs above, you can select one of the available LTTs (Laser Technology Tables) that match. The hyperlink to the 2D Laser Guide… can help in this selection.
When you enter all these values and click Enter, a nesting Job is created, and the Job Panel is displayed.
The nesting job can be saved using the File / Save menu as an .fxjob file. This contains all the information used to define the nesting job (including copies of the parts used for nesting), so it is self contained and can be opened later using the File / Open menu to redo the nest with modified settings.