
Part deposit
After the bending is completed, the finished part is deposited on a pallet or conveyor, or dropped into a basket. Various settings are used to control this deposit operation:
-
The position, type and orientation of the deposit pallet
-
The grid of parts on the pallet (rows, columns, layers)
-
The orientation of the part on the pallet
These settings are controlled mainly from the Deposit panel, Pallet panel and Gripper panel that is supporting the deposit operation. These panels are displayed below. They are all interconnected by up/down navigation links.
Deposit panel
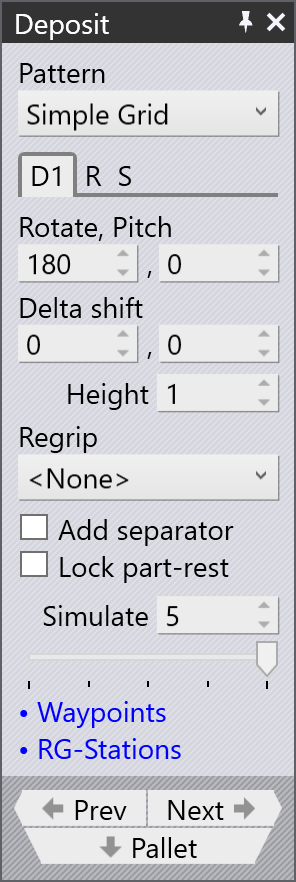
The deposit panel manages the primary settings for placing a part onto a pallet, basket, or conveyor. Click on the cells like D1, D2 etc on the bend navigator to open the deposit panel or by clicking on one of the finished parts lying on the deposit pallet.
-
Pattern: This link brings up the details of different deposit pattern types available for the part deposit operation.
-
Deposit tabs: The deposit panel contains several tabs that allow you to configure different aspects of the deposit operation. See the Part 1 settings (D1), Repeat grid (R), Deposit sequence (S) for details.
-
Waypoints: This link brings up the Waypoints editor panel where the robot trajectory during deposit can be fine-tuned.
-
RG-Stations: This link brings up the Regrip Station panel where the position of the regrip station during the deposit operation can be configured.
-
Prev and Next: Use these buttons to navigate to the previous and the next operation panels.
-
Gripper: This button takes you to the gripper panel and allows you to configure the gripper settings used during the deposit operation.
-
Pallet: This button takes you to the pallet panel and allows you to configure the settings related to the deposit pallet.
Pallet panel
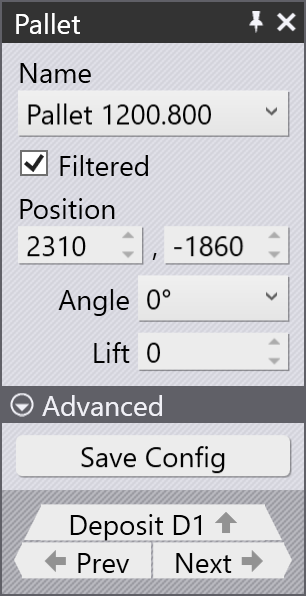
The pallet panel allows you to configure various settings related to the deposit pallet. Click on the deposit pallet (or conveyor, or basket) to open the pallet panel or click on the pallet icon in the deposit panel to navigate to the pallet panel.
-
Name: Lists pallets compatible with the current part. To see all available pallets, clear the Filtered checkbox.
-
Position: These inputs are used to position the pallet in Z and X (in cell coordinates).
-
Lift: Use this input to lift the pallet above the base floor.
-
Angle: Use this input to rotate the pallet.
-
Save Config: Use this button under the Advanced section to save current pallet configuration (including all pallets) as a default for this machine.
-
Deposit D1: This button takes you to the deposit panel and allows you to configure the settings related to the deposit operation.
-
Prev and Next: Use these buttons to navigate to the other pallets.
Gripper panel
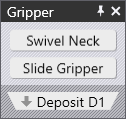
The gripper panel allows you to configure various settings related to the gripper used during the deposit operation. Click on the gripper open the gripper panel or click on the gripper icon in the deposit panel to navigate to the gripper panel.
-
Swivel Neck: This option helps to rotate the Jaw Neck with 180° rotation.
-
Slide Gripper: This option helps to move the gripper sled to the other side.
| This gripper panel is available only when the jaw gripper is used during the deposit operation. |